
How to Install Oracle Solaris 11 (Text Installer)
You can install Oracle Solaris 11 by using either an interactive or an automated installation. With an interactive installation, you have two options:
- The LiveCD for x86-based systems
- A text installer that can be used on either x86 or SPARC machines
These options are designed for installing the OS on a single system, whereas the automated installation option (commonly known as the Automated Installer, or AI) provides a “hands-free” network installation on a single system or for multiple-client systems.
System Requirements
Make sure the system has the below minimum requirements fulfilled, before beginning the installation of Solaris 11.
| Hardware | Requirement |
|---|---|
| Disk space | Recommended minimum: 13 GB |
| Memory | Recommended minimum: 1 GB |
| Architectures | X86: 64-bit only, SPARC: Oracle Solaris M-series and T-series systems only |
Installing Oracle Solaris 11 Using an Interactive Installer (Text Install on x86 VM)
For the purpose of this post, we will install Oracle Solaris 11 in an x86 VM machine. The process remains same while installing on SPARC based systems. To prepare for the installation, you first download and save the ISO image to your system. Select the ISO image as the boot media in Bios to begin the installation.
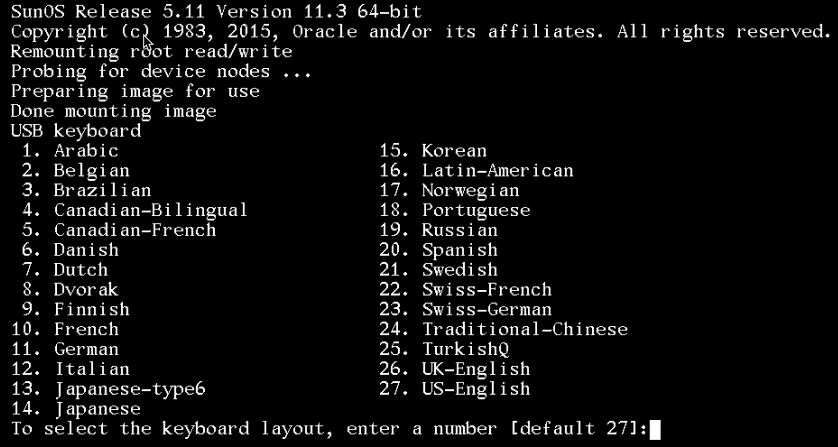
On the First screen, you are prompted to select the keyboard layout and language. Select appropriate keyboard layout and language here and proceed.

On next screen, you would see the text installer menu. The menu contains several options:
- Install Oracle Solaris: Allows you to install the operating system
- Install Additional Drivers: Allows you to install any device drivers that may be required to support the operating system
- Shell: Provides a shell; can be used to debug the installation
- Terminal type (currently sun-color): Provides a means of displaying the text installer correctly in case the default terminal type doesn’t work
- Reboot: Enables you to reboot the system after the installation has completed

To initiate the installation, select option 1. The default, as indicated by the number 1 in brackets, is to install Oracle Solaris, so all you have to do is press Enter to continue.
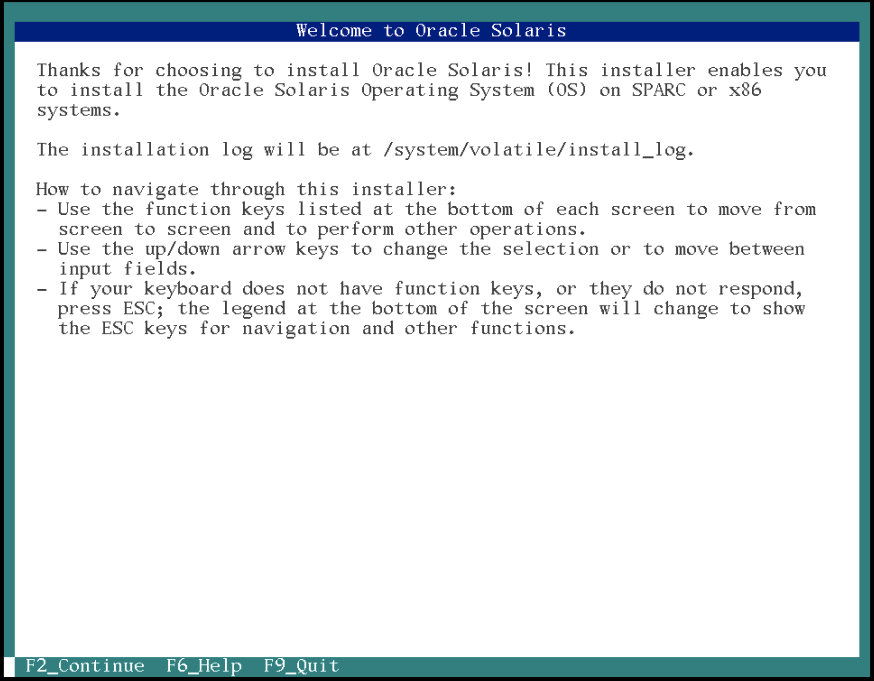
“Welcome to Oracle Solaris” Screen
This screen provides you with the temporary location of the installation log (/system/volatile/install_log) as well as instructions on how to navigate through the installer by using the function keys located at the bottom of the screen and the up and down arrow keys. To continue to the Disk screen, press the F2 function key.
Selecting a Disk
From the Welcome screen, you are taken to the Disks screen, where you are prompted to select where you want Oracle Solaris to be installed. To select the highlighted disk and continue to the next screen, press F2.


Selecting an Fdisk Partition
From the Disks screen, you are taken to the Fdisk Partitions (or the formatting disks) screen, where you can select to use a whole disk or to partition the disk. The “Use the whole disk” option is highlighted by default. Using the whole disk is highly recommended. To select this option and continue to the next screen, press F2.

Selecting a Network
The next screen is the Network screen, where you provide a computer name and select the wired Ethernet network connection configuration (Automatically, Manually, or None). The Automatically option automatically configures the network connection for you. The Manually option enables you to manually configure the network connection by responding to the prompts presented on the subsequent screens. The None option tells the system that you do not want to configure the network at this time.
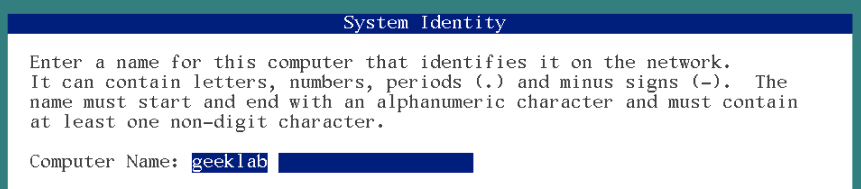

To select one of these options, arrow down to Automatically, Manually, or None. When you have the desired option highlighted, press F2 to select it and continue. For this post example, you will manually configure the network.
Manually Configuring the Network
The next screen prompts you for the IP address for the network interface. In this example, the network interface is net0. When you have entered the required information for your network configuration, press F2 to continue.

DNS Name Service
The next screen provides you the opportunity to configure a DNS name service. To configure a DNS name service, select the first option. If you do not want to configure DNS, select the second option. In this example, you are not going to configure DNS.

Alternate Name Service
The next screen enables you to select an alternate name service, such as LDAP or NIS. For this example, you are going to select None.

Selecting the Time Zone: Regions
The next screen that appears is “Time Zone: Regions“, where you select the region that contains the time zone that is appropriate to your installation. To make your selection, arrow down to the region and then press F2 to select it and continue. In this example, you are going to select Asia.

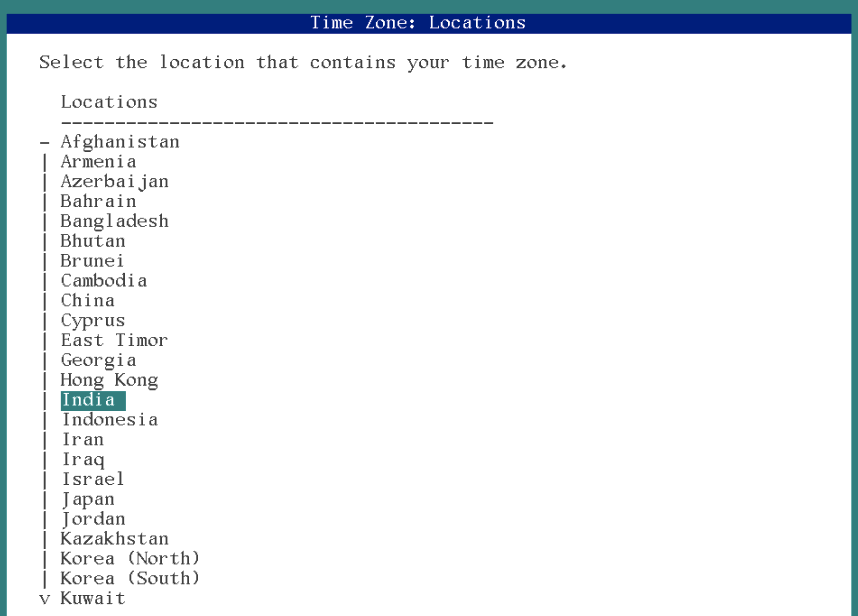
Setting the Time Zone: Locations
The next screen is the Time Zone: Locations screen, where you select the location that contains the time zone that is appropriate to your installation. Again, to make your selection, arrow down to the location of your choice and then press F2 to select it and continue. In this example installation, India is selected for the location.
Selecting the Time Zone
You next see the Time Zone screen. The selections presented on this screen are based on the region and location selections you made previously. To select the appropriate time zone, arrow down until your time zone is highlighted, and then press F2. To support the example installation, you select Asia/Kolkata.

Setting the Date and Time
The “Date and Time” screen appears next. Review the information that is presented and edit it as required. Note that the time is in the 24-hour format. After you have made the necessary edits, press F2 to continue.

Providing User Information
Next is the Users screen, where you enter your user information to include the system root password, your name, your username, and your user password. To continue, press F2.

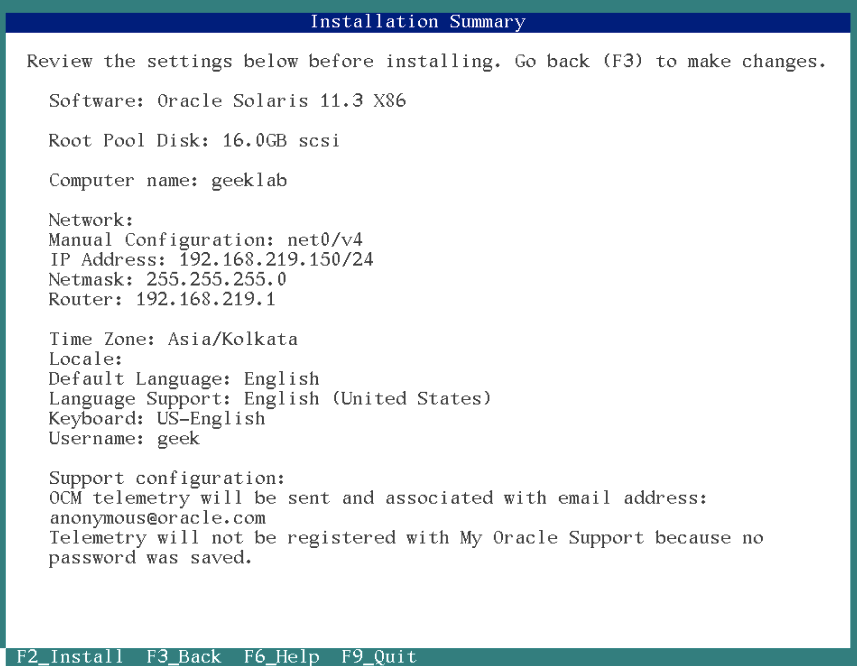
Reviewing Installation Summary
After completing the configuration data, you see the Installation Summary screen. Review the information carefully to make sure it is accurate before you start the installation. To start the installation, press F2.
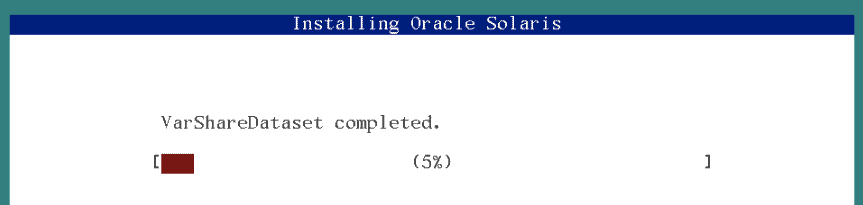
Monitoring the Installation
The Installing Oracle Solaris screen enables you to monitor the progress of the installation. The installation takes about 10 to 15 minutes to complete.
Verifying the Installation
When the installation concludes, the Installation Complete screen appears. This screen provides you with access to the installation log and, an opportunity to verify that no error messages were generated and that all the major facilities installed successfully.

You have the option of viewing the log at its /system/volatile/install_loglocation before rebooting by pressing F4. Alternatively, you can view the log at /var/sadm/system/logs/install_log after reboot.
Rebooting the System
After you have verified that the installation was successful, you can reboot the system by pressing F8. If you press F9 to quit, you are returned to the text installer menu, where you can select option 5 to reboot the system.
No comments:
Post a Comment