
How to clone a solaris 11 zone
In the last post we saw how to install and configure a basic solaris 11 zone. We can use the ZFS clone feature to clone the existing zone to create new ones. This saves us the time to install and create new zone everytime with all the new softwares that are common to all the zones.
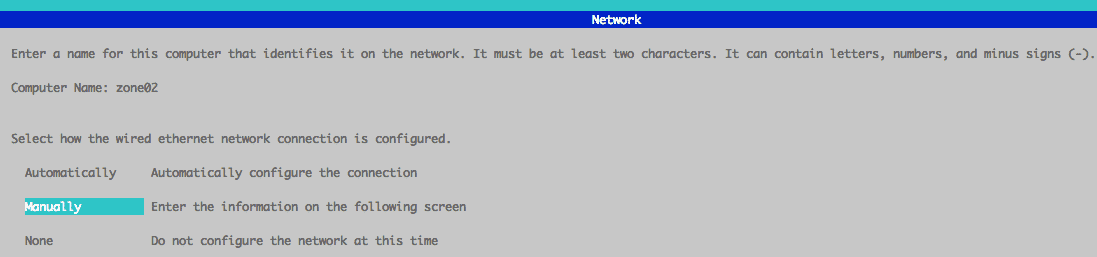
As seen in the last post we have a zone named zone01 already created on the global zone. First step to clone any zone is to create a profile and store it as a template. Login to the non-global zone and use sysconfig to create the configuration template which will be used later to install and configure our cloned zone, zone02. The system configuration tool will start upon executing the sysconfig command and you can configure the hostname, IP address , time zone etc.
Configuration Template creation
root@geeklab:~# zlogin zone01
root@zone01:~# sysconfig create-profile -o /root/zone02-template.xml
The system configuration tool will guide you through the configuration process:

Set the hostname for the zone as zone02 and mode of network configuration as manual.
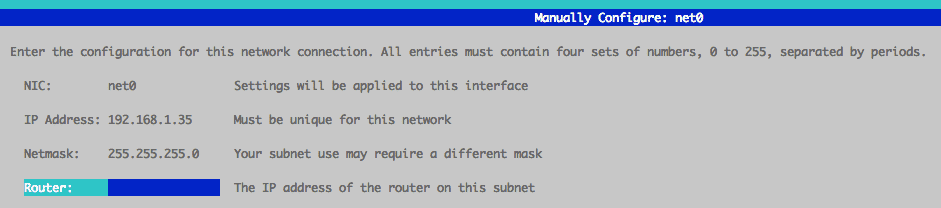
On the next screen give the IP address to the NIC card net0 and a netmask.
We will not configure any DNS service so select “Do not configure DNS”.

Select “None” option for alternate name service.

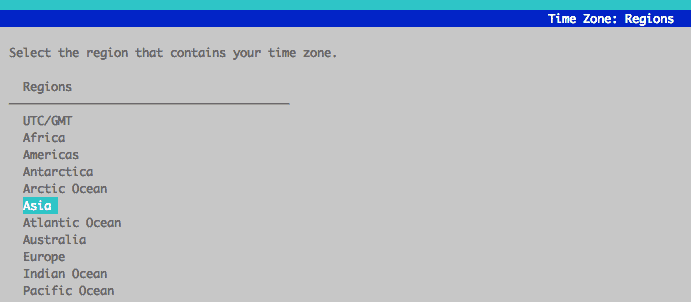
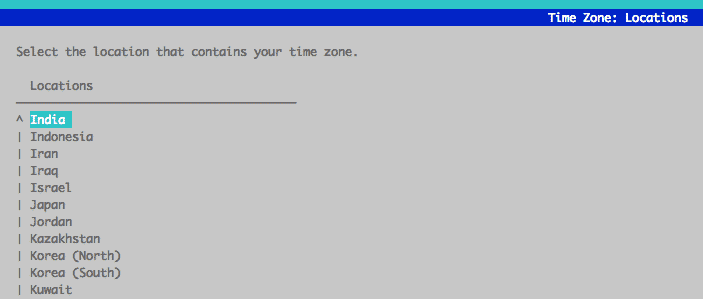
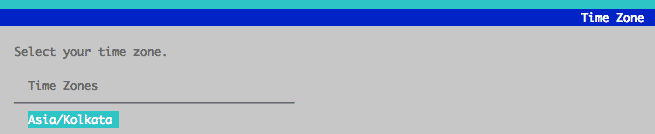
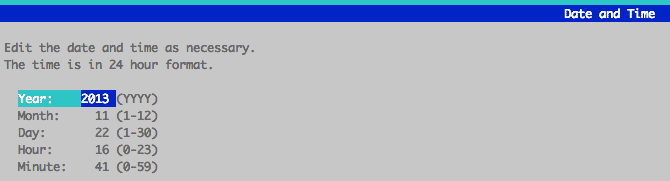
On the next screens set the time zone according to your location.
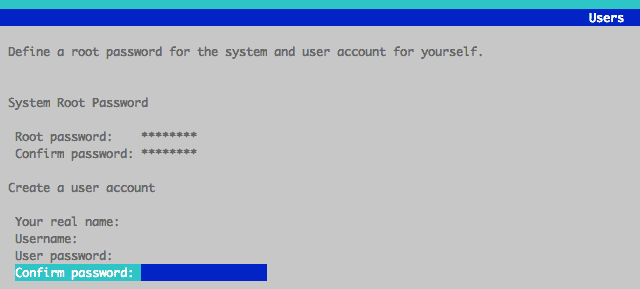
Now set the root password. Also if you want any user to be created, you can do it on this screen. Note that, you can not create a user which already present in zone01.
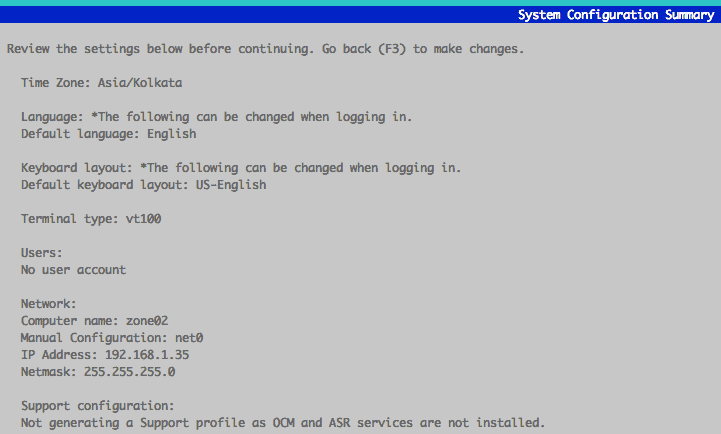
Double check the system configuration summary before going forward.
Profile creation
Now we will create the profile for our zone02. We need to first halt the zone01 from the global zone.
root@geeklab:~# zoneadm -z zone01 halt
root@geeklab:~# zoneadm list -ivc
  ID NAME             STATUS     PATH                           BRAND    IP
   0 global           running    /                              solaris  shared
   - zone01           installed  /rpool/zone01                  solaris  excl
Export the zone01 configuration which we will use as a profile template for creating our new zone, zone02.
root@geeklab:~# zonecfg -z zone01 export -f zone02-profile
Edit the zone02-profile file and change zonepath to /rpool/zone02 (make sure you have created this file system). Make sure you have double quotes around “-m verbose”, otherwise it will give an error while creating the zone02.
root@geeklab:~# cat zone02-profile
create -b
set brand=solaris
set zonepath=/rpool/zone02
set autoboot=true
set bootargs="-m verbose"
set ip-type=exclusive
add anet
set linkname=net0
set lower-link=auto
set configure-allowed-address=true
set link-protection=mac-nospoof
set mac-address=random
end
Copy the configuration xml template to somewhere in global zone.
root@geeklab:~# cp /rpool/zone01/root/root/zone02-template.xml /var/tmp/
Now create the zone02 by cloning the zone01. First we will use zonecfg and the modified profile file of zone02 to configure the zone02 and then clone the zone01 by using the zoneadm command.
root@geeklab:~# zonecfg -z zone02 -f /root/zone02-profile
root@geeklab:~# zoneadm -z zone02 clone -c /var/tmp/zone02-template.xml zone01
/rpool/zone02 must not be group readable.
/rpool/zone02 must not be group executable.
/rpool/zone02 must not be world readable.
/rpool/zone02 must not be world executable.
changing zonepath permissions to 0700.
Progress being logged to /var/log/zones/zoneadm.20131122T124138Z.zone02.clone
Log saved in non-global zone as /rpool/zone02/root/var/log/zones/zoneadm.20131122T124138Z.zone02.clone
Confirm the creation of zone02. You would see new zfs chiled datasets created under rpool/zone02 filesystem. Also check zoneadm list command output.
root@geeklab:~# zfs list |grep zone02
rpool/zone02                            366K  4.47G    35K  /rpool/zone02
rpool/zone02/rpool                      330K  4.47G    31K  /rpool
rpool/zone02/rpool/ROOT                 310K  4.47G    31K  legacy
rpool/zone02/rpool/ROOT/solaris-0       308K  4.47G   420M  /rpool/zone02/root
rpool/zone02/rpool/ROOT/solaris-0/var    44K  4.47G  23.8M  /rpool/zone02/root/var
rpool/zone02/rpool/VARSHARE               1K  4.47G    39K  /var/share
rpool/zone02/rpool/export                 2K  4.47G    32K  /export
rpool/zone02/rpool/export/home            1K  4.47G    31K  /export/home
root@geeklab:~# zoneadm list -ivc
  ID NAME             STATUS     PATH                           BRAND    IP
   0 global           running    /                              solaris  shared
   - zone01           installed  /rpool/zone01                  solaris  excl
   - zone02           installed  /rpool/zone02                  solaris  excl
Boot the new zone and login into the console of the zone. Now unlike the normal configuration of a solaris 11 zone with System configuration Tool, the OS uses the XML template to configure the zone. Thus we do not have to give any input to configure the zone02.
root@geeklab:~# zoneadm -z zone02 boot
root@geeklab:~# zlogin -C zone02
Exit out of the console of the zone02 by pressing “~.”.
Login to the zone and verify the network settings and filesystems.
root@zone02:~# ipadm show-addr
ADDROBJ           TYPE     STATE        ADDR
lo0/v4            static   ok           127.0.0.1/8
net0/v4           static   ok           192.168.1.35/24
lo0/v6            static   ok           ::1/128
net0/v6           addrconf ok           fe80::8:20ff:febf:cf6e/10
root@zone02:~# zfs list
NAME                       USED  AVAIL  REFER  MOUNTPOINT
rpool                     37.3M  4.43G    31K  /rpool
rpool/ROOT                37.2M  4.43G    31K  legacy
rpool/ROOT/solaris-0      37.2M  4.43G   453M  /
rpool/ROOT/solaris-0/var   246K  4.43G  23.8M  /var
rpool/VARSHARE              19K  4.43G    39K  /var/share
rpool/export                36K  4.43G    32K  /export
rpool/export/home           18K  4.43G    31K  /export/home
No comments:
Post a Comment