
How to create a zone in solaris 11
In oracle solaris 10, zones was introduced which gave us an ability to create isolated environments for applications that can run on a single machine. Solaris 11 has added a lot of new features to the zones technology. Let us get started and see how we can create a zone in solaris 11. In case you are new to solaris zones refer the post how to create zones in solaris 10 to get started.
Pre-requisites :
1. A good laptop/desktop with Solaris 11 virtual machine (VMware workstation or virtualbox).
2. IPS repository. (refer the post)
3. ZFS file system to install zone (This is mandatory is Solaris 11).
2. IPS repository. (refer the post)
3. ZFS file system to install zone (This is mandatory is Solaris 11).
Configuring the zone
First thing we need is a installation path for the new zone to be created. I am going to create a filesystem under rpool of global zone.
root@geeklab:~# zfs create rpool/zone01
Using zonecfg we will create the new zone, zone01 and assign the necessary resources through the interactive configuration flow of zonecfg command.
root@geeklab:~# zonecfg -z zone01
Use 'create' to begin configuring a new zone.
zonecfg:zone01> create
create: Using system default template 'SYSdefault'
zonecfg:zone01> set zonepath=/rpool/zone01
zonecfg:zone01> set autoboot=true
zonecfg:zone01> set bootargs="-m verbose"
zonecfg:zone01> verify
zonecfg:zone01> commit
zonecfg:zone01> exit
Verify the zone we have created
root@geeklab:~# zoneadm list -icv
  ID NAME             STATUS     PATH                           BRAND    IP
   0 global           running    /                              solaris  shared
   - zone01           configured /rpool/zone01                  solaris  excl
Installing the zone
Before installing the zone make sure you have a IPS repository available to use as Solaris 11 uses IPS to install the new zone by downloading the installation image from IPS repository. I have a local repository set in my global zone.
root@geeklab:~# pkg publisher
PUBLISHER                   TYPE     STATUS P LOCATION
solaris                     origin   online F file:///sol_11_repo/repo/
Now install the zone using below command :
root@geeklab:~# zoneadm -z zone01 install
/rpool/zone01 must not be group readable.
/rpool/zone01 must not be group executable.
/rpool/zone01 must not be world readable.
/rpool/zone01 must not be world executable.
changing zonepath permissions to 0700.
Progress being logged to /var/log/zones/zoneadm.20131122T084145Z.zone01.install
       Image: Preparing at /rpool/zone01/root.

 AI Manifest: /tmp/manifest.xml.C8aOIi
  SC Profile: /usr/share/auto_install/sc_profiles/enable_sci.xml
    Zonename: zone01
Installation: Starting ...

              Creating IPS image
Startup linked: 1/1 done
              Installing packages from:
                  solaris
                      origin:  http://localhost:1008/solaris/ffbe7adc15370eee5e159f41613703a3f440bf35/
DOWNLOAD                                PKGS         FILES    XFER (MB)   SPEED
Completed                            183/183   33556/33556  222.2/222.2  560k/s

PHASE                                          ITEMS
Installing new actions                   46825/46825
Updating package state database                 Done
Updating image state                            Done
Creating fast lookup database                   Done
Installation: Succeeded

        Note: Man pages can be obtained by installing pkg:/system/manual

 done.

        Done: Installation completed in 510.747 seconds.

  Next Steps: Boot the zone, then log into the zone console (zlogin -C)

              to complete the configuration process.

Log saved in non-global zone as /rpool/zone01/root/var/log/zones/zoneadm.20131122T084145Z.zone01.install
The zone is installed now. Check the status of the installed zone:
root@geeklab:~# zoneadm list -icv
  ID NAME             STATUS     PATH                           BRAND    IP
   0 global           running    /                              solaris  shared
   - zone01           installed  /rpool/zone01                  solaris  excl
You can also check the file systems that are created under /rpool/zone01 for the zone01.
root@geeklab:~# zfs list |grep zone
rpool/zone01                          414M  4.50G    32K  /rpool/zone01
rpool/zone01/rpool                    414M  4.50G    31K  /rpool
rpool/zone01/rpool/ROOT               414M  4.50G    31K  legacy
rpool/zone01/rpool/ROOT/solaris       414M  4.50G   390M  /rpool/zone01/root
rpool/zone01/rpool/ROOT/solaris/var  24.3M  4.50G  23.7M  /rpool/zone01/root/var
rpool/zone01/rpool/VARSHARE            31K  4.50G    31K  /var/share
rpool/zone01/rpool/export              62K  4.50G    31K  /export
rpool/zone01/rpool/export/home         31K  4.50G    31K  /export/home
The ZFS dataset used to create the zones gives us the ability to clone the zones.
Booting the zone
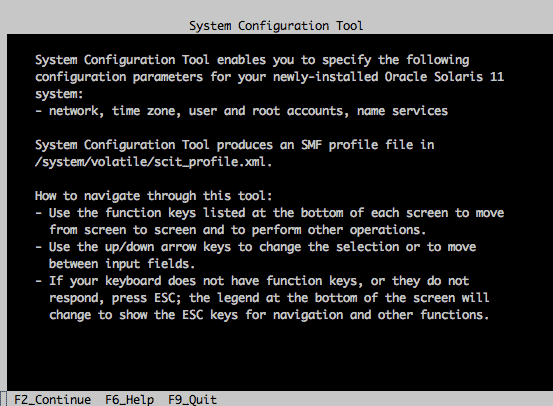
Now the final step is to boot the configured, installed zone and configure the zone using the System Configuration Tool (SCI).
root@geeklab:~# zoneadm -z zone01 boot
root@geeklab:~# zlogin -C zone01
[Connected to zone 'zone01' console]
The system configuration tool starts after you press enter. Use ESC + 2 to navigate through the next screens.
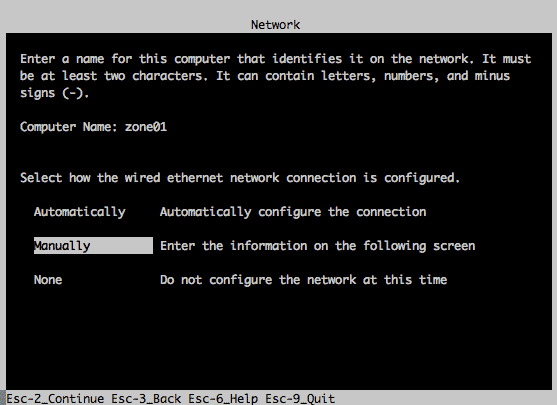
Set the hostname for the zone as zone01 and mode of network configuration as manual.
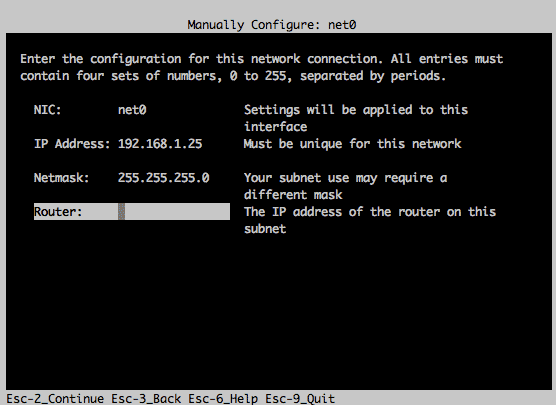
On the next screen give the IP address to the NIC card net0 and a netmask.
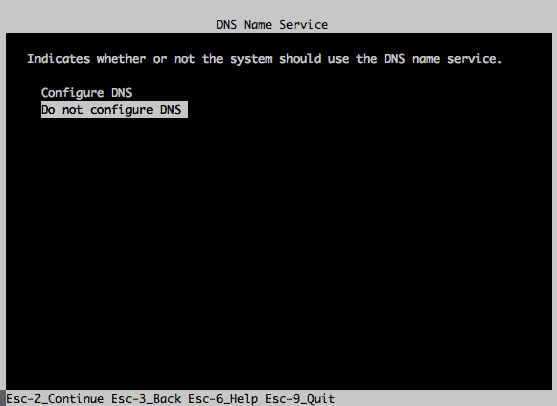
We will not configure any DNS service so select “Do not configure DNS”.
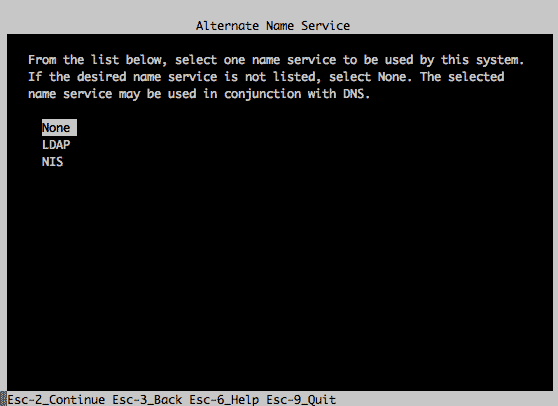
Select “None” option for alternate name service.
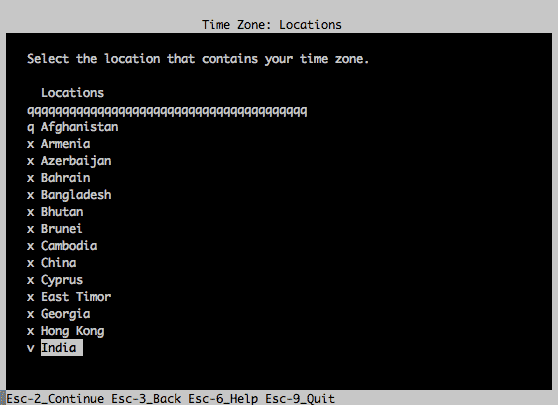
On the next screens set the time zone according to your location.


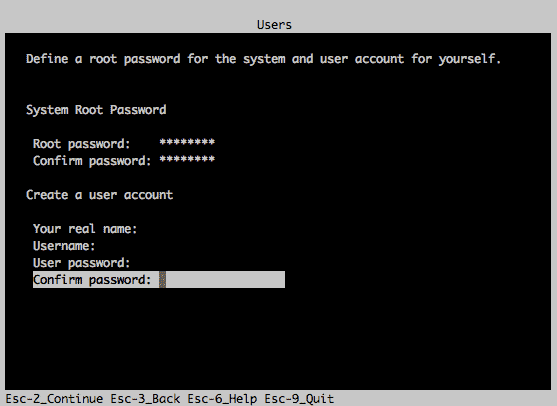
Now set the root password. Also if you want any user to be created, you can do it on this screen.
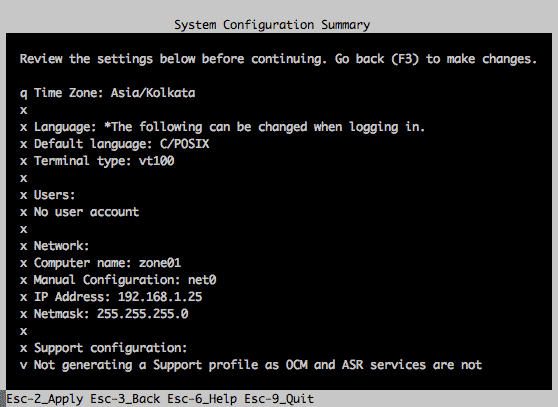
Double check the system configuration summary before going forward.
After this the system will get configured. No need to login as its the console login of the zone. Use “~.” to come out of the console.
Check the status of the zone01 from the global zone. It should be running now.
Check the status of the zone01 from the global zone. It should be running now.
root@geeklab:~# zoneadm list -icv
  ID NAME             STATUS     PATH                           BRAND    IP
   0 global           running    /                              solaris  shared
   1 zone01           running    /rpool/zone01                  solaris  excl
If you check dladm, you would see a virtual NIC created :
root@geeklab:~# dladm show-link
LINK                CLASS     MTU    STATE    OVER
net0                phys      1500   up       --
zone01/net0         vnic      1500   up       net0
Now login to the zone
root@geeklab:~# zlogin zone01
[Connected to zone 'zone01' pts/3]
Oracle Corporation      SunOS 5.11      11.1    September 2012
root@zone01:~# uname -a
SunOS zone01 5.11 11.1 i86pc i386 i86pc
Check the network settings :
root@zone01:~# dladm show-link
LINK                CLASS     MTU    STATE    OVER
net0                vnic      1500   up       ?
root@zone01:~# ipadm show-addr
ADDROBJ           TYPE     STATE        ADDR
lo0/v4            static   ok           127.0.0.1/8
net0/v4           static   ok           192.168.1.25/24
lo0/v6            static   ok           ::1/128
net0/v6           addrconf ok           fe80::8:20ff:fe89:4b7c/10
root@zone01:~# ifconfig -a
lo0: flags=2001000849[UP,LOOPBACK,RUNNING,MULTICAST,IPv4,VIRTUAL] mtu 8232 index 1
        inet 127.0.0.1 netmask ff000000
net0: flags=1000843[UP,BROADCAST,RUNNING,MULTICAST,IPv4] mtu 1500 index 2
        inet 192.168.1.25 netmask ffffff00 broadcast 192.168.1.255
        ether 2:8:20:89:4b:7c
lo0: flags=2002000849[UP,LOOPBACK,RUNNING,MULTICAST,IPv6,VIRTUAL] mtu 8252 index 1
        inet6 ::1/128
net0: flags=20002004841[UP,RUNNING,MULTICAST,DHCP,IPv6] mtu 1500 index 2
        inet6 fe80::8:20ff:fe89:4b7c/10
        ether 2:8:20:89:4b:7c
If you check zfs list, you would only see zfs dataset assigned to zone and not the global file system.
root@zone01:~# zfs list
NAME                     USED  AVAIL  REFER  MOUNTPOINT
rpool                    441M  4.48G    31K  /rpool
rpool/ROOT               441M  4.48G    31K  legacy
rpool/ROOT/solaris       441M  4.48G   416M  /
rpool/ROOT/solaris/var  24.4M  4.48G  23.8M  /var
rpool/VARSHARE            39K  4.48G    39K  /var/share
rpool/export              63K  4.48G    32K  /export
rpool/export/home         31K  4.48G    31K  /export/home
To check the complete configuration details of the zone from non-global zone :
root@geeklab:~# zonecfg -z zone01 info
zonename: zone01
zonepath: /rpool/zone01
brand: solaris
autoboot: true
bootargs: -m verbose
file-mac-profile:
pool:
limitpriv:
scheduling-class:
ip-type: exclusive
hostid:
fs-allowed:
anet:
 linkname: net0
 lower-link: auto
 allowed-address not specified
 configure-allowed-address: true
 defrouter not specified
 allowed-dhcp-cids not specified
 link-protection: mac-nospoof
 mac-address: random
 auto-mac-address: 2:8:20:89:4b:7c
 mac-prefix not specified
 mac-slot not specified
 vlan-id not specified
 priority not specified
 rxrings not specified
 txrings not specified
 mtu not specified
 maxbw not specified
 rxfanout not specified
 vsi-typeid not specified
 vsi-vers not specified
 vsi-mgrid not specified
 etsbw-lcl not specified
 cos not specified
 pkey not specified
 linkmode not specified
No comments:
Post a Comment